
- Home
- News, Articles & Reviews
We are hiring! Please click here to join our growing magazine delivery team in Gloucestershire!
Areas
Pets & Wildlife
Archive

How to make your own insect hotel
All Areas > Pets & Wildlife > Wildlife Matters
Author: Helen Kingscott, Posted: Monday, 25th November 2019, 09:00

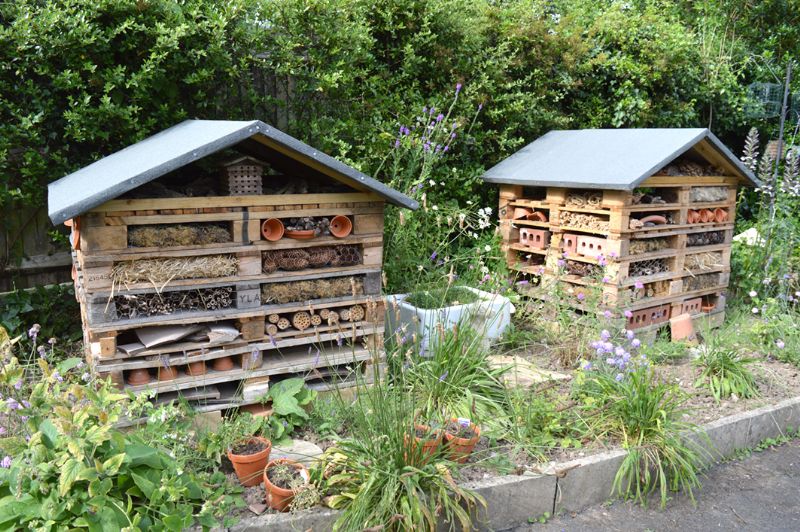
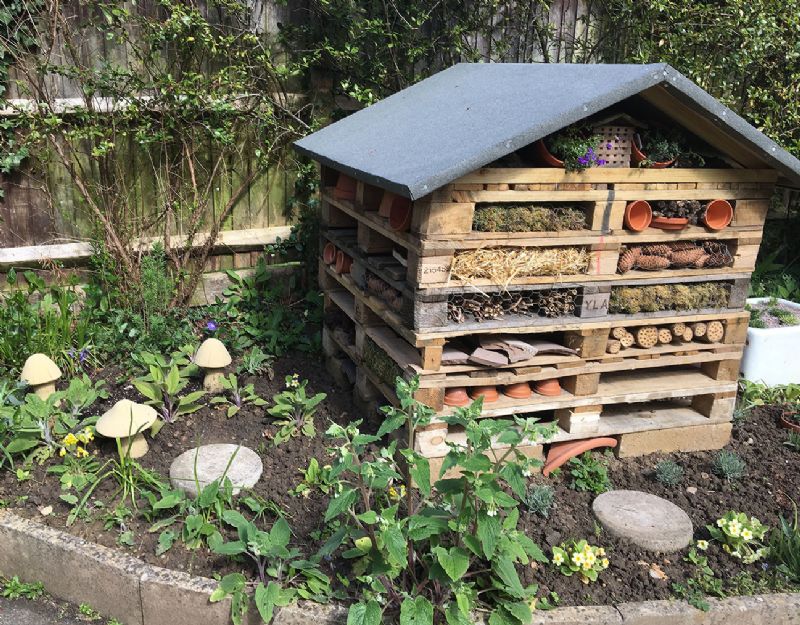
I can’t believe how many people have commented on my insect hotels and asked to take photos of them with a view to creating their own. So, I thought I would share some images and details in the hope it inspires you to construct your own wildlife haven.
First you need to get hold of some pallets. There are so many businesses that receive items on pallets and are glad to see them go to good use. Knock on a few doors in trade parks and industrial estates near you and, if you ask nicely, they’ll probably give you them for free. You’ll need a good size vehicle to transport larger pallets – we used six pallets, each measuring 1.2m x 1m x 12cm deep.
Pallets do vary in size but, if you can only get hold of the larger ones and don’t have enough space in your garden, you can always saw them down to size. Many have wide gaps between the wooden slats that you’ll be looking to rest items on – use bits from any spare pallets or other suitable sized off-cuts to fill the spaces and avoid things falling to the level below.
Step 1
To start with you need to level off the ground where you are going to position the insect hotel, making a flat area at least 50cm wide and longer than the pallets you’ve got to use.
Step 2
We then put some breeze blocks on the ground (recycled from a wall partition we knocked down) so the bottom pallet wouldn’t quickly rot, as it would if just placed on the earth.
It’s best to place the blocks in each corner and at other strategic points where the underside of the pallet will benefit from the support – there will be quite a lot of weight going on top – but leave gaps between that are plenty big enough for frogs and toads to get through and make a home. You could use old house bricks instead, which are often discarded by builders when renovating houses – just ask if you can take some from the skip.
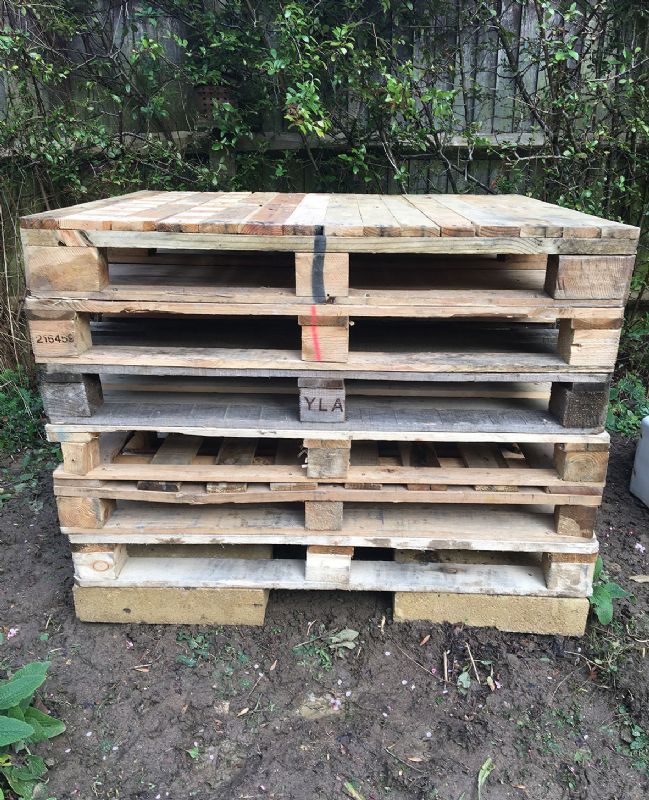
Step 3
Now place the pallets on top of each other, screwing each to the one beneath as you build the stack. Even just a few screws for each pallet layer will really strengthen your insect hotel, making it more robust and safer for its new residents.
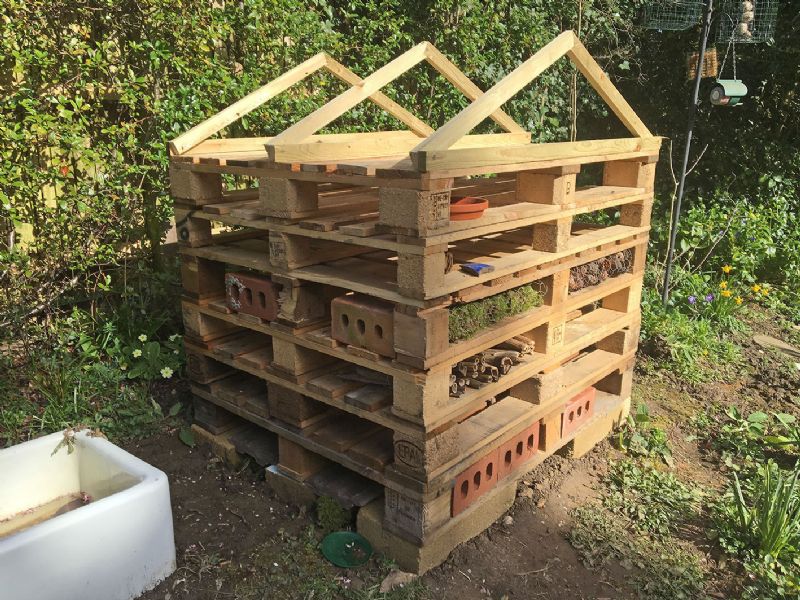
Step 4
Time for the roof. I started filling the layers before the roof went on – I’d already collected a few bits and pieces and I couldn’t wait!
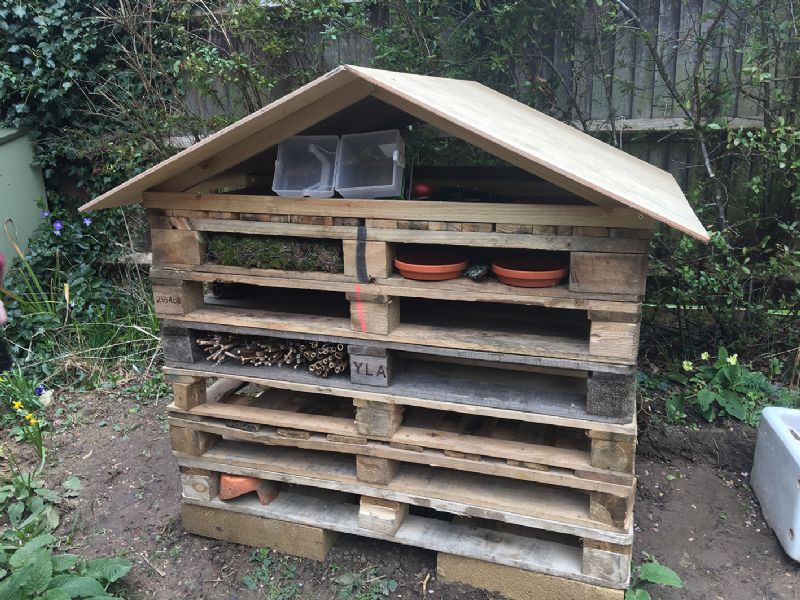
You don’t need to create an apex roof like the ones my husband constructed – a solid wooden sheet cut to size will make a decent flat roof, but make sure you raise the height on one side with a strip of wood beneath in order for most of the rain to run off. If you haven’t got a big sheet and only wish to use recycled materials, join smaller pieces together that overlap each other.
It’s not essential, but covering any style of roof with some felt will protect it, and all beneath, from the elements and give your insect hotel a longer life. I have since ‘painted’ some live natural yoghurt on to the roof, which will help lichen and fungi to grow and give the hotel a more natural look – i.e. not so clean!
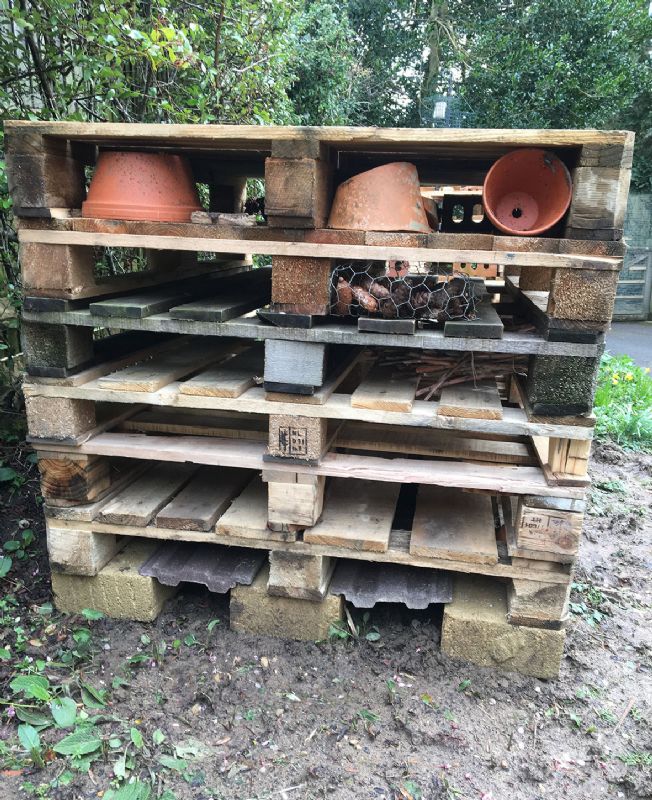
Step 5
Well that’s the hard work over, now it’s the fun bit – filling the gaps in each layer. I take my dog up the hill every day, so as soon as I knew I was going to have an insect hotel, I regularly took a bag with me to collect anything I thought might be useable.
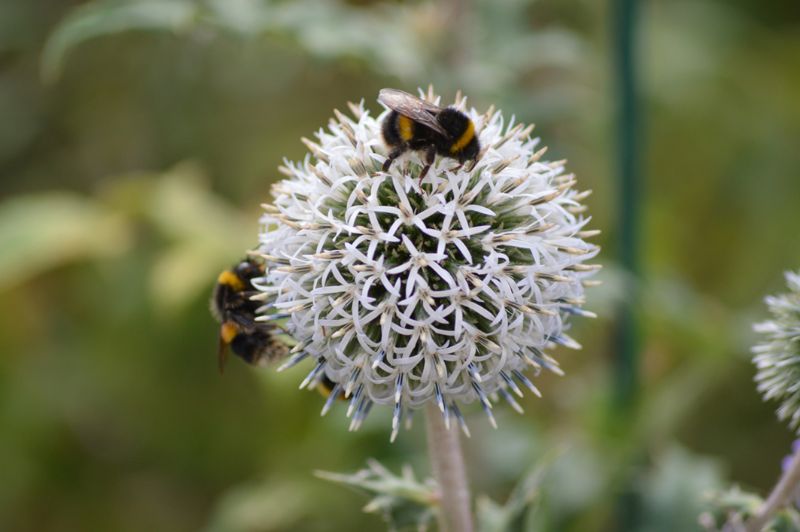
I also have a wildlife garden, which provides plenty of dry flower heads that work well for insects.
Here is a list of things I collected that may give you more ideas:
• Pine cones
• Beech nut cases
• Straw
• Moss
• Horse hair/dog hair
• Dried flower heads – thistles, hydrangea heads, teasels, stems of rhubarb (which had gone to seed)
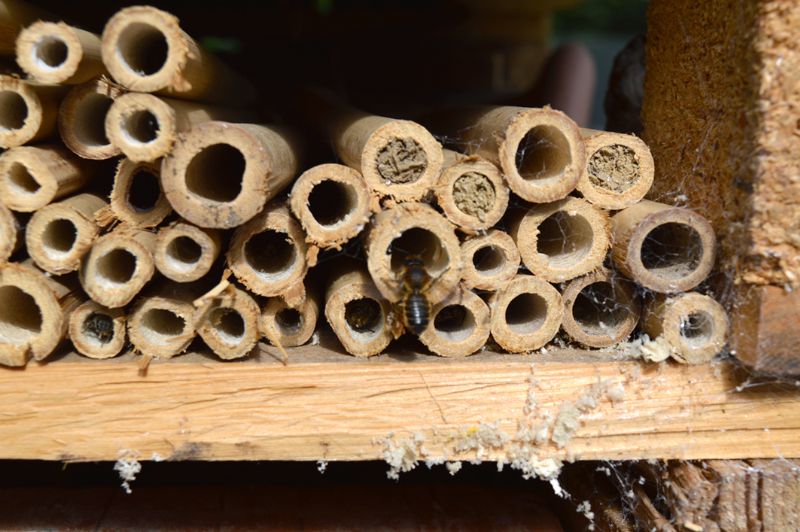
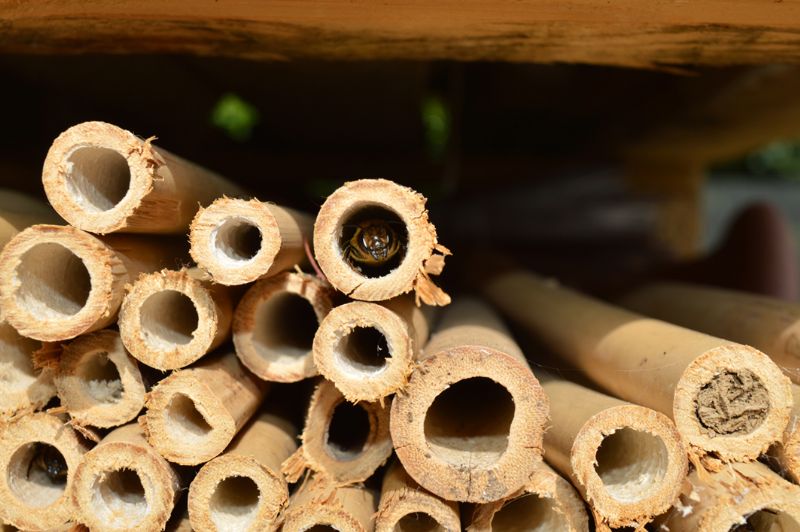
• Bamboo canes bought from a nursery then sawn into several lengths – these are mainly used for solitary bees (see my photos; the bees are fascinating to watch as they make their nests)
• Pieces of broken garden pots – most nurseries have a place where they put broken pots for you to take
• House bricks with holes in them
• Logs from a fallen tree with holes drilled in them
• Terracotta pots from a nursery/garden centre – I’m sure something will end up living in them
• House slates/roof tiles – putting some of these at the bottom, resting on the breeze blocks, creates nice dark spaces for frogs and toads
• Bark from fallen trees
• Dried leaves
For smaller items like the pine cones and beech nut cases, it’s best to get some chicken wire and make a little cage to keep them up together. Otherwise, they fall out as soon as there’s a strong breeze. I’ve also had to put chicken wire over the front of some items to stop my dog from stealing them!
If you decide to build your own insect hotel, I hope you enjoy the project! It’s so rewarding when you see wildlife using the construction, as you know you’ve created a habitat for them all.
Please send us your photos to admin@thelocalanswer.co.uk – we’d love to see what you create!Other Images
Copyright © 2026 The Local Answer Limited.
Unauthorized use and/or duplication of this material without express and written permission from this site's author and/or owner is strictly prohibited. Excerpts and links may be used, provided that full and clear credit is given to The Local Answer Limited and thelocalanswer.co.uk with appropriate and specific direction to the original content.More articles you may be interested in...


© 2026 The Local Answer Limited - Registered in England and Wales - Company No. 06929408
Unit H, Churchill Industrial Estate, Churchill Road, Leckhampton, Cheltenham, GL53 7EG - VAT Registration No. 975613000You are leaving the TLA website...
You are now leaving the TLA website and are going to a website that is not operated by us. The Local Answer are not responsible for the content or availability of linked sites, and cannot accept liability if the linked site has been compromised and contains unsuitable images or other content. If you wish to proceed, please click the "Continue" button below: